Monday, September 17, 2012

Free Eyeglasses

A few weeks ago I was approached to try out some free eye glasses.  I got to admit I was a wee bit suspicious but decided to give it a shot.

The offer was made by Firmoo.com (http://www.firmoo.com/free-glasses.html), the deal was very simple.  Go to their site, select my preferred glasses (or sunshades, prescription or non prescription), complete the form and that was it.

I was a little concern that the lenses would come cracked or maybe the frames would be lopsided, but everything arrived perfect - the glasses were securely wrapped.


There was also a Precision Screwdriver Keychain Eyeglass Repair Tool


Eyeglass precision tool for repairs


Eyeglass precision tool for repairs


Here's everything that came with my eyeglasses


eyeglasses from Firmoo


eyeglasses from Firmoo


Hard case for glasses


eyeglasses &case from Firmoo


Soft pouch for eyeglasses


soft eyeglass case from Firmoo


There was a wide selection of eyelasses to choose from, but the fun part was that I was able to upload my photo to see what the eyeglasses would look like on me before ordering.  Pretty great! 

They actually offer FREE  EYEGLASSES to first time buyers (you just pay for the shipping).  They have neat eyeglasses starting from just $8, so if you have 2+ kids that need glasses, or if you need extra glasses how neat can that be.  Where else can you buy the frame and lenses for a measly $8?  

All I had to do was complete a form which asked for among other things, my prescription and my eyeglass selection.  It took just a few days to receive my glasses.  Did I mention they were FREE?

I submitted my request and 2 days later my order was acknowledged and I was told it had been sent to Customer Service.  Two days later Customer Service confirmed receipt, and two days later they communicated the glasses were being shipped, two days later I received my eyeglasses.  Simple and hassle free, but best of all FREE.


eyeglasses & case from Firmoo


If you want free eyeglasses, and if you are a first time buyer,  your first order is free!  Just visit this site http://www.firmoo.com/free-glasses.html.   LET YOUR CREATIVITY FLOW!


Monday, September 10, 2012

Update on my Painted Bathroom Faucets

A friend of mine was browsing through my blog and saw where I had painted my bathroom faucets.  She was considering about painting hers but wanted to know how mine were holding out.  So, here's my update - 1 year later.

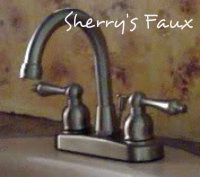
This was my faucet before


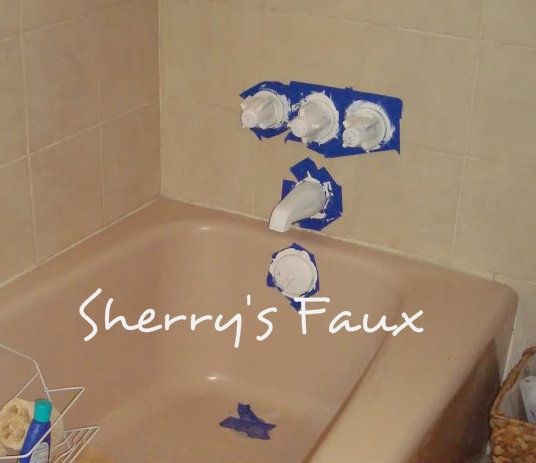
About a year ago I had been looking for a bronze faucet for my tub, mine had lots of mineral deposits built up on it and needed to be changed.  In the Bahamas it's difficult finding really nice triple handle tub & shower sets, the only thing available were those cheap looking shiny chrome faucets with the clear knobs.  Anyways, I was complaining to my sister and she suggested I try painting mine.  What could it hurt?  

This was going to be a temporary fix (3-6 months) just until I could find something classy!  


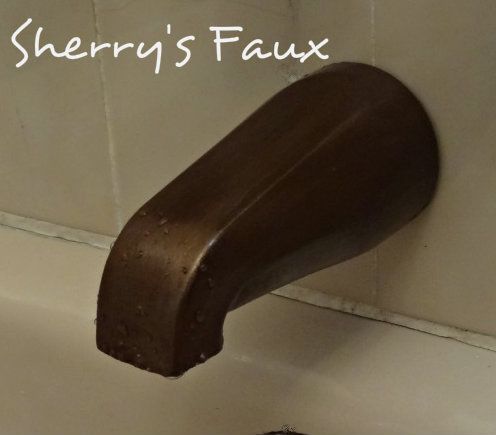
Well after 1 year of use, they're still holding. I used Zinnser primer shellac based, Modern Masters Statutory Bronze metallic paint and Zinnser polyurethane as a sealer.  The process was simple:

  1. Sand faucets lightly to give it some tooth (I had lots of mineral deposit built up on mine so it took lots & lots of sanding to get it down)
  2. Prime, let dry then sand; prime, let dry then sand (check the can to see how long you should wait before sanding, I think I waited about 3-4 hours after my first priming)
  3. Paint, wait 12 hours, then sand (I repeated this step 3 times)
  4. Seal with polyurethane, wait 6 hours, then sand (I continued this step about 6 times)

I waited 7 days before using the fixtures, assuming that was enough time for curing.

Surprisingly, they're still holding up after 1 year of use.  Yep, these babies get used every day (365 days) - the tub usually twice a day & the sink constantly! These pictures were taken yesterday.


Because our water is so hard over here, I try to make a conscious effort to keep the faucets wiped down after use, this helps to reduce build up of deposits.


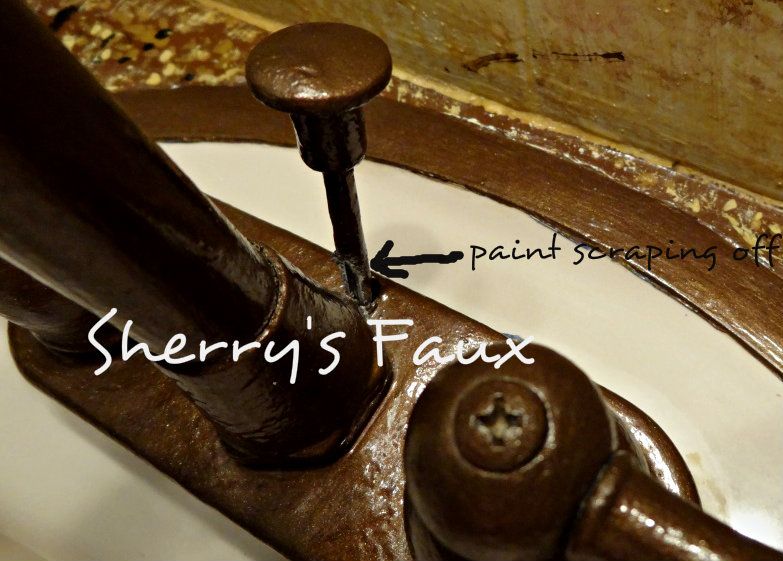
You can see below where I also painted the rim of the basin.


I've only had one problem, you can see below where some of the paint scraped off, but I guess that was to be expected.  Actually, it's not even noticeable unless you stick your head back there.


So, what was suppose to be a temporary fix, is now going into it's second year.   Would I do it again?  Yes!  But I would do things differently.  Painting fixtures while still attached to a basin or tub is tedious work.  It would have been much easier if I could have just spray painted them outside, no taping and less clean up afterwards.  Hmmm, I wonder if it'll hold up for another year? If so, I'll definitely give an update.  LET YOUR CREATIVITY FLOW!

Monday, September 3, 2012

how i Decorate with Jewelry

I never realized how much I depended on my jewelry to glamorize my house.  I'm not exactly sure when it started but the other day I noticed the trend.  Although I buy lots and lots of constume jewelry, I don't always wear it, however, looking around, I see where my house is benefiting from my jewelry  ;)

Maybe it was the earth tones that lured me to use these necklaces on my breakfast table...


My kitchen counter vignette has a old wooden cross dangling from wool twine...


...that trails from my Jamaican Mountain coffee


This anklet was made for me by my son years ago


I have it encircling my kitchen clock


This old pearl necklace adds a tidbit of elegance entwined in the floral arrangment I have sitting ontop of my dining table.


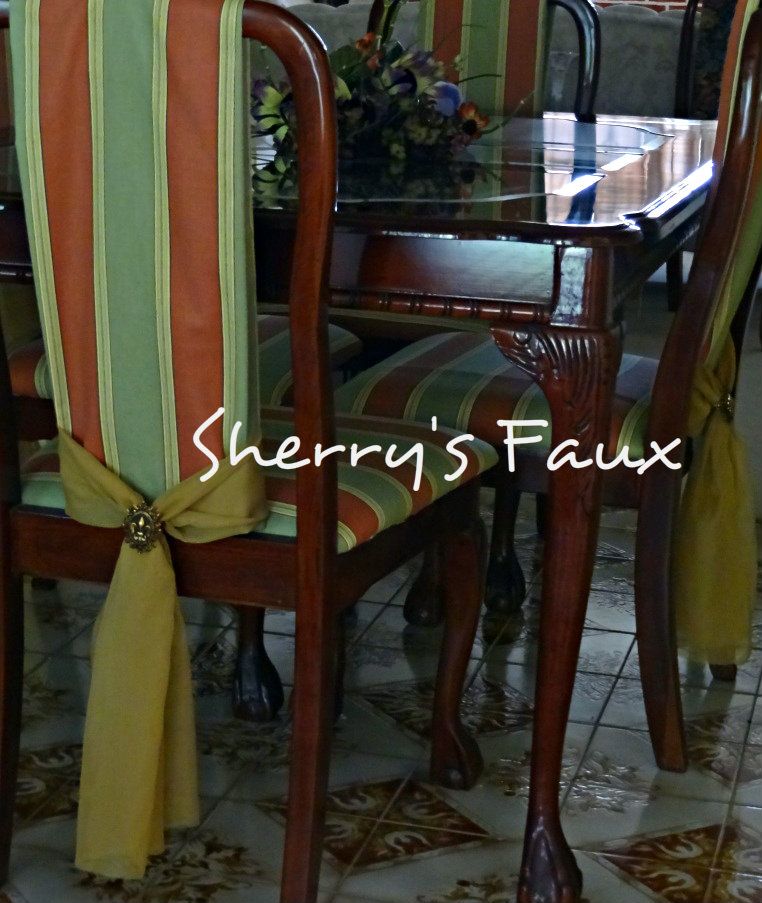
And the dining chairs were adorned with pieces of sheer fabric held together by a big decorative ring


I gracefully draped these necklaces around this crusted jar to give it more eye appeal


I took one of my bronze metal necklace's and dangled it from the cup holder in my bath


I used pearls to adorn my Armoire


Then there was the necklace that I had to tarnished to make this clock a little more "grandfatherly".


There you have it.  Like I said I can't remember when I started this trend, and I guess some might think it's a little unorthodox, but it's definitely a cheap economical way for me to add a little "umpf" to my decor.  LET YOUR CREATIVITY FLOW!