In my earlier blog when I updated my spare bath I mentioned I couldn't find the faucets I was looking for so I opted to spray paint what I had.
While I had experience painting faucets (see here) I had never spray painted faucets, especially while they were still in tact on the wall. Although I was skeptical at first, it turned out to be very simple and only took 2 days to complete.
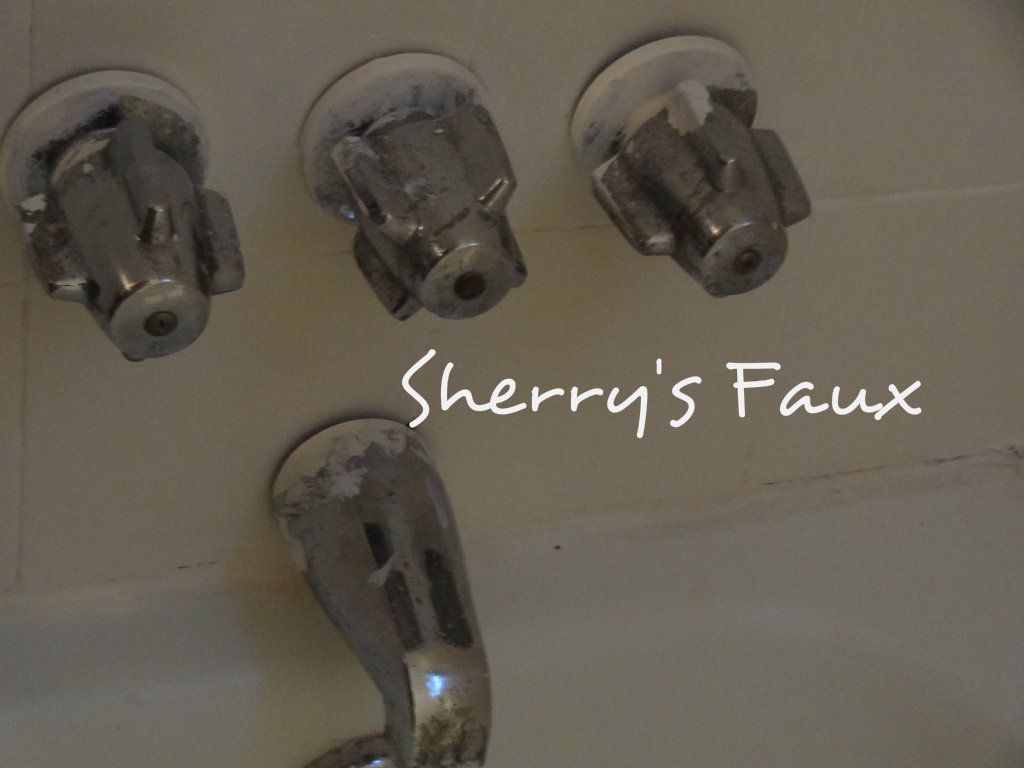
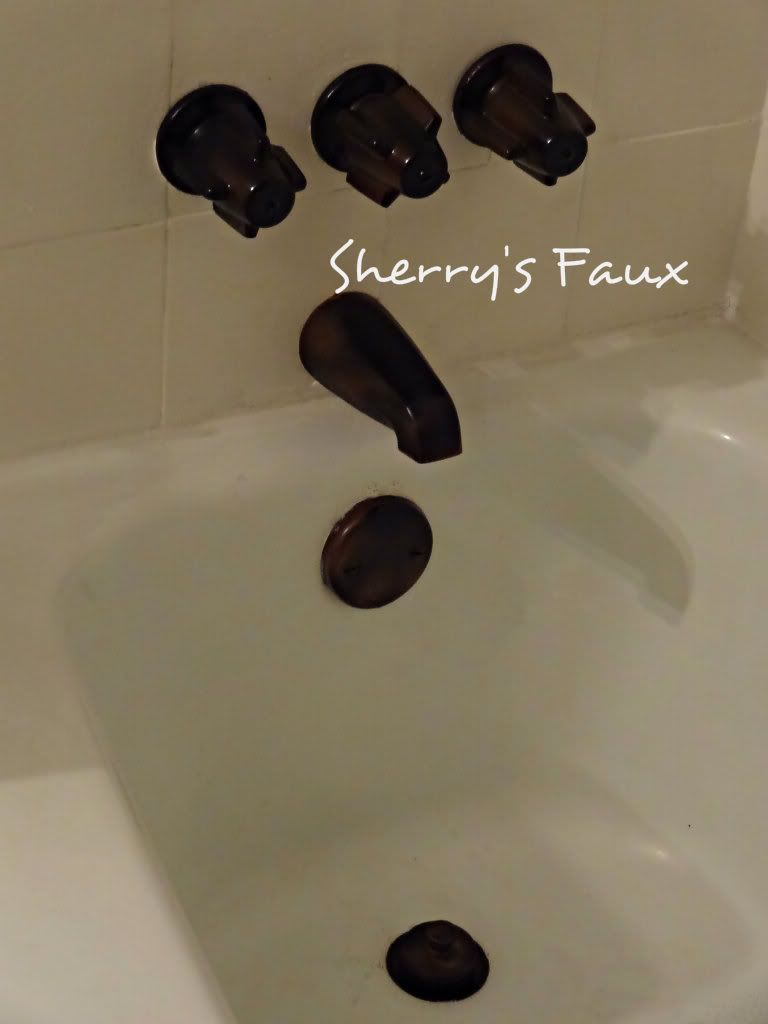
Here were my faucets before
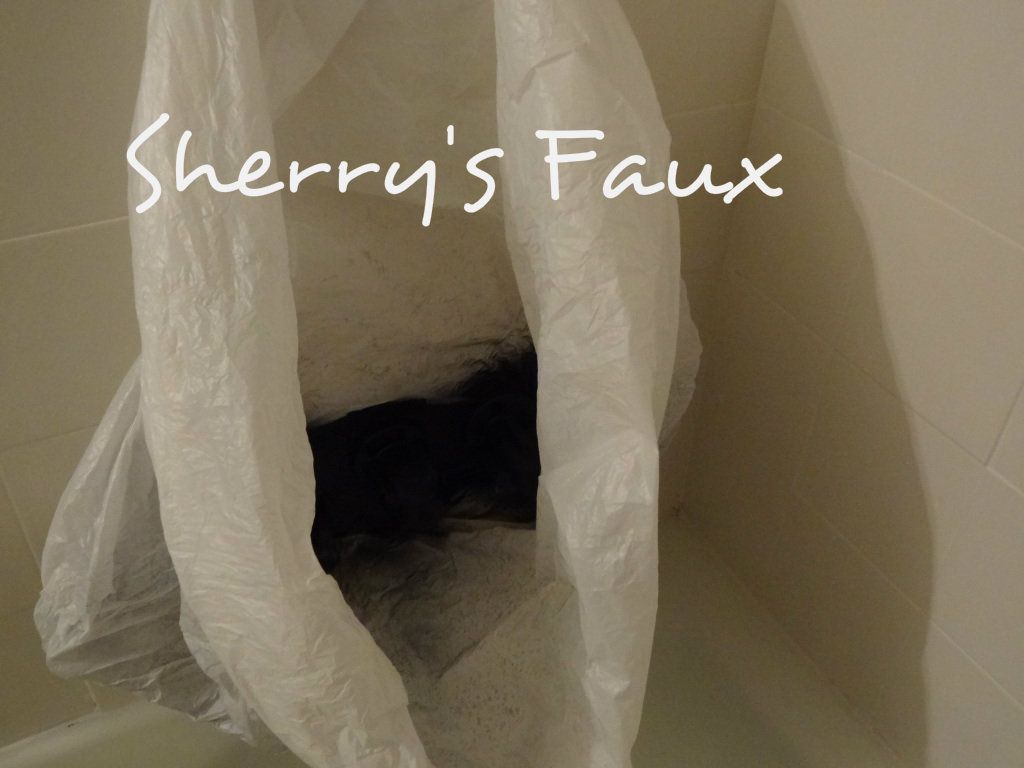
To start, tape around faucets thoroughly, don't be stingy with your tape! (this is important if you don't want the paint to leak through on your walls)

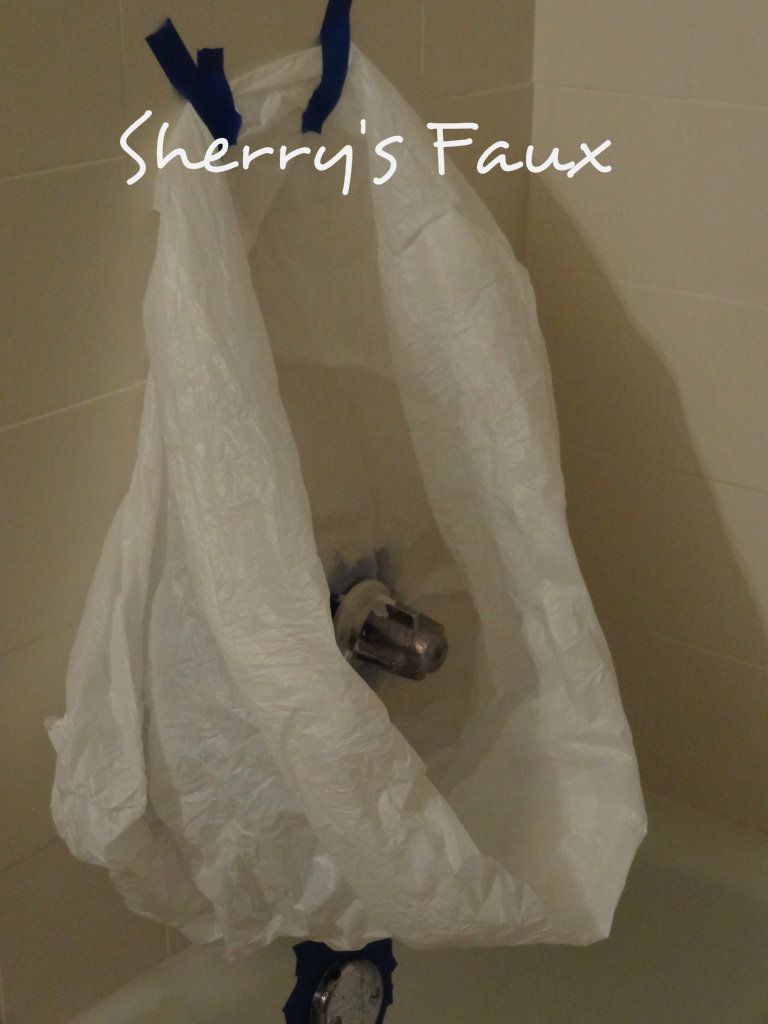
Grab a plastic bag, cut a hole at the bottom, slip the bag over the faucets and tape (make sure there's no opening at the bottom or the paint can seep through and get on your walls or tub.

If you're satisfied with your tape job, grab your spray paint and start spraying. Here's the paint I used.

I used the black Paint & Primer In One for the base coat (this is suppose to be for metal);
After the 1st coat was dry (I gave it an hour), I applied the 2nd coat I used copper

Once that was dry (another hour or so) I applied the 3rd coat - the black Paint & Primer In One again, but this time I sprayed it sparingly. I wanted that two-tone look. I gave it a day and then I sealed it with the Clear Gloss (I used several coats, but waited 30 minutes between each coat)


After I removed the tape I discovered what happens when you don't tape properly ;-(
Thankfully, with a Q-tip & paint remover I was able to clean up my goof.

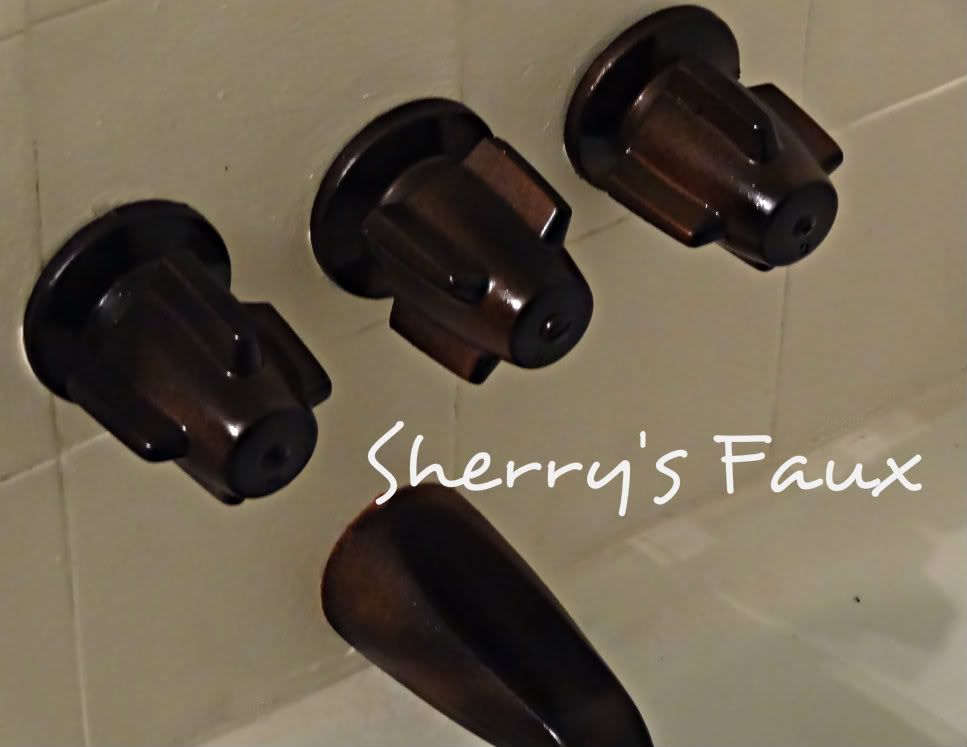
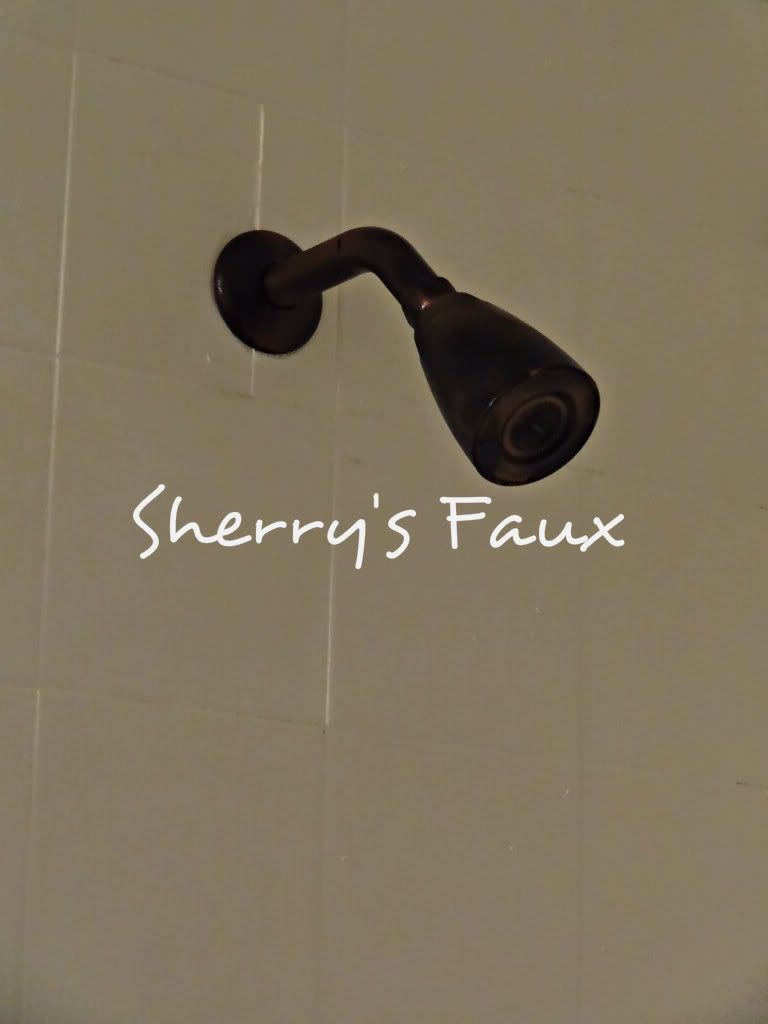
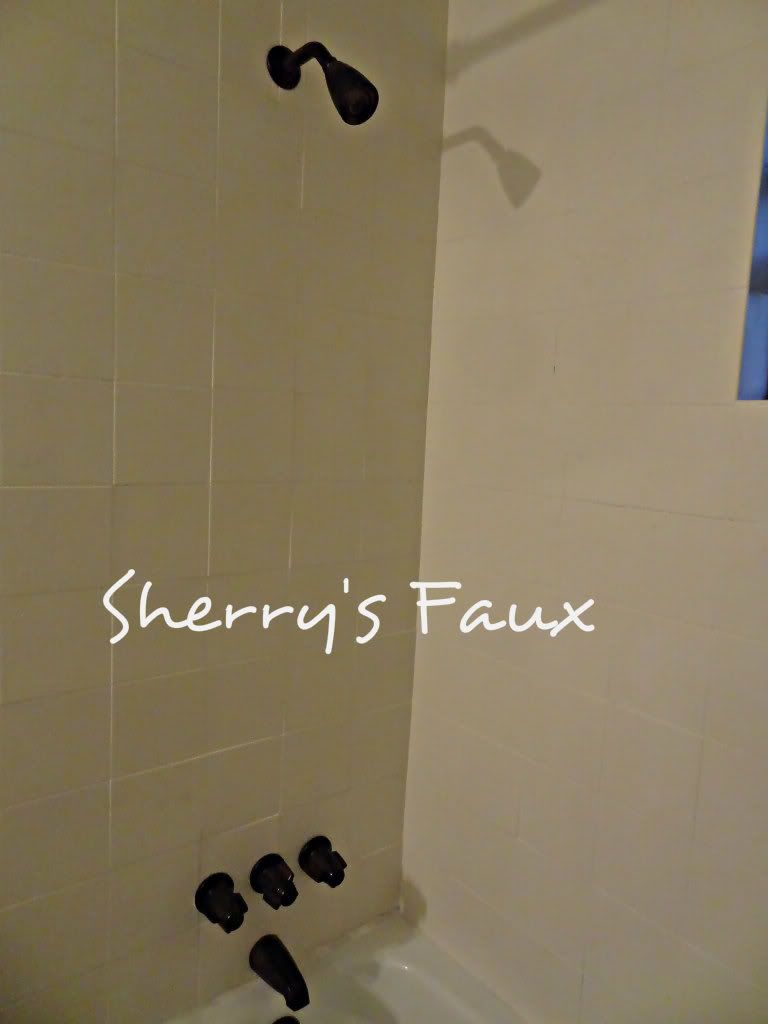
I love how my faucets turned out!

Note this is the spare bath and it will be a few weeks before it gets used, which is plenty of time for the paint to cure. I realize this is a temporary fix but I'm hoping this will last for a year or until I can find the perfect faucets.
You can see more here, but if you prefer to use a paint brush click here.
I would advise giving it a week or more before using your faucets, just to make sure the paint is cured. So the next time you're looking for a temporary fix, get creative, have fun LET YOUR CREATIVITY FLOW!
While I had experience painting faucets (see here) I had never spray painted faucets, especially while they were still in tact on the wall. Although I was skeptical at first, it turned out to be very simple and only took 2 days to complete.
Here were my faucets before
To start, tape around faucets thoroughly, don't be stingy with your tape! (this is important if you don't want the paint to leak through on your walls)
Grab a plastic bag, cut a hole at the bottom, slip the bag over the faucets and tape (make sure there's no opening at the bottom or the paint can seep through and get on your walls or tub.
If you're satisfied with your tape job, grab your spray paint and start spraying. Here's the paint I used.
I used the black Paint & Primer In One for the base coat (this is suppose to be for metal);
After the 1st coat was dry (I gave it an hour), I applied the 2nd coat I used copper
Once that was dry (another hour or so) I applied the 3rd coat - the black Paint & Primer In One again, but this time I sprayed it sparingly. I wanted that two-tone look. I gave it a day and then I sealed it with the Clear Gloss (I used several coats, but waited 30 minutes between each coat)
After I removed the tape I discovered what happens when you don't tape properly ;-(
Thankfully, with a Q-tip & paint remover I was able to clean up my goof.
I love how my faucets turned out!
Note this is the spare bath and it will be a few weeks before it gets used, which is plenty of time for the paint to cure. I realize this is a temporary fix but I'm hoping this will last for a year or until I can find the perfect faucets.
You can see more here, but if you prefer to use a paint brush click here.
I would advise giving it a week or more before using your faucets, just to make sure the paint is cured. So the next time you're looking for a temporary fix, get creative, have fun LET YOUR CREATIVITY FLOW!
8 comments:
Oh you are unbelievably awesome girl! These are fabulous!
Hi, Sherry
This is great! You really did a great job changing the color. It's tricky to get it the right color. Awesome!
I think they look pretty darn sharp as well! You did good, girl!
What a great idea !
They look great. The power of paint is so awesome.
Love the way it looks.
How did this hold up?
Hi Tami, It's been almost 4 years since doing this and it's still holding up well, however, this is my guest bath so it doesn't get used regularly - only when I have guests staying over or when my son visits from abroad. Thanks so much for visiting.
Post a Comment