I'm not too sure what happened, I posted this earlier, right after hurricane Sandy, but while checking my posts I see where this was labeled as a draft. So, I'm re-posting.
---------------------------------
MY SPARE BATH IS COMPLETED! Well, there're some minor details, like pictures on the walls, but that's not a rush. Here's what I did
- Framed the mirror,
- Put molding around the tub
- Made a bath tray
- Changed the curtains (window & shower)
- Added a few accessories.
Below is a preview of where I started and finished.
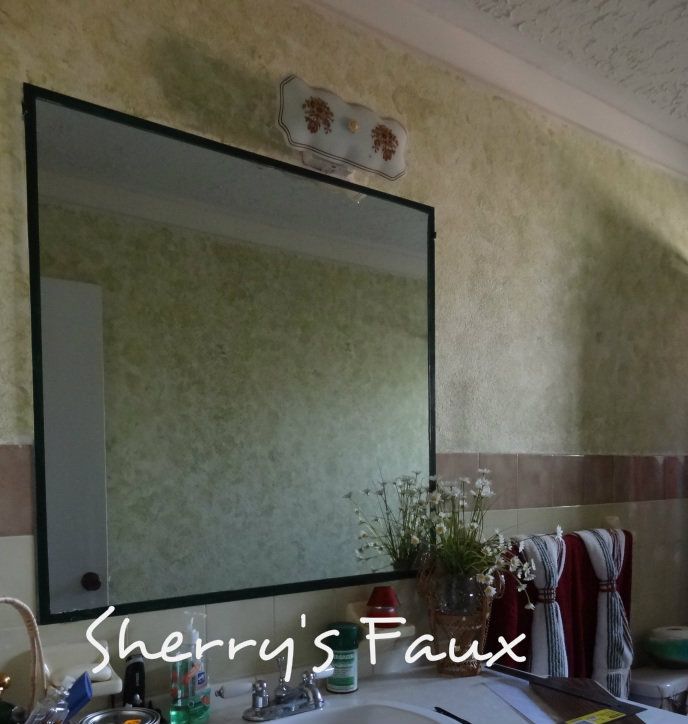
MIRROR BEFORE (years ago I had painted a small frame around it)
 |
| Plain mirror painted around edges |
MIRROR AFTER (plastic molding was used for frame, I then dry brushed with Caramel & Avocado - same paint I used on vanity. A caulking adhesion was used to adhere frame to mirror.)
 |
| Mirror framed |
 |
| Framed mirror |
LIGHT FIXTURE BEFORE
 |
| Framed mirror |
NEW LIGHT FIXTURE & FRAMED MIRROR
 |
| Framed mirror & new light fixture |
BATHTUB BEFORE (rusting at bottom)
BATHTUB AFTER (Rosette blocks & molding were added to base of tub for a more modern appearance; adhesion caulking was used to adhere to tub)
 |
| Molding added around floor of tub |
 |
| Molding added around floor of bathtub |
BATH TRAY (I took a piece of wood, added molding to the side for my bath tray. Initially I was going to go with an alternate color, but knowing how I can change the color of my bathroom within a year's time, I decided to keep it the same color of my bathtub. I doubt I'll be changing my tub anytime soon.)
The bath tray is light, so it's easy to move around (raised stenciling was added)
 |
| White bath tray with raised stenciling |
 |
| White bath tray with raised stenciling |
SOAP HOLDER (Can I call this a cloche? If so it's my first) I used a top I've been holding onto and the globe from a light fixture I had just changed.
 |
| Cap from a jar |
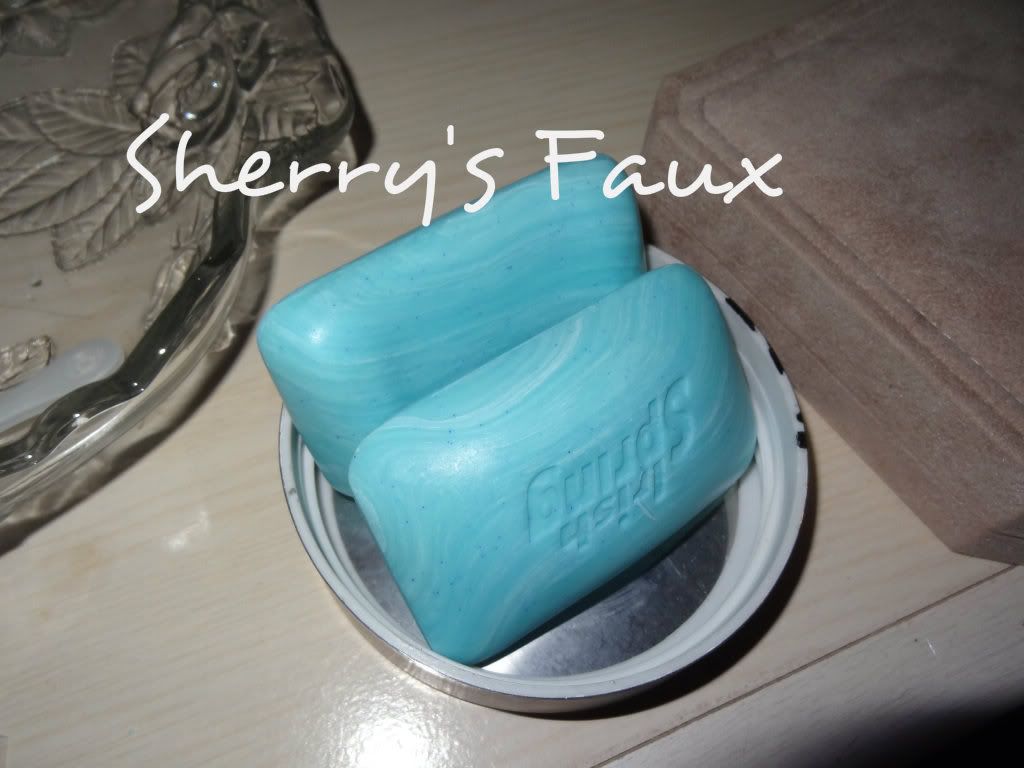 |
| Soap placed in cap |
 |
| Light globe used for soap dish/ |
 |
| Light globe used as cloche for soap |
 |
| Molding bottom of tub & bath tray |
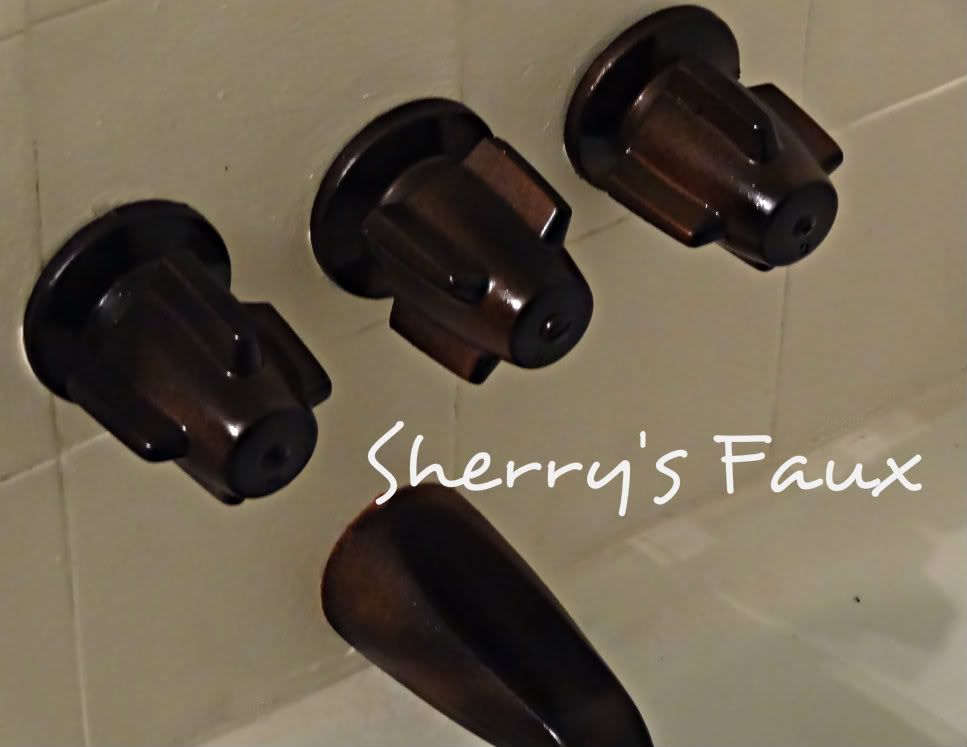
BATH FAUCETS BEFORE
SPRAY PAINTED BATH FAUCETS (black & copper) (you can see more here)
 |
| Spray painted bath fixtures |
 |
| Spray painted bath fixtures & shower head |
VANITY BEFORE
VANITY AFTER (you can see more here)
 |
| Green Vanity with raised stenciling |
 |
| raised stenciling |
CERAMIC TILE BEFORE
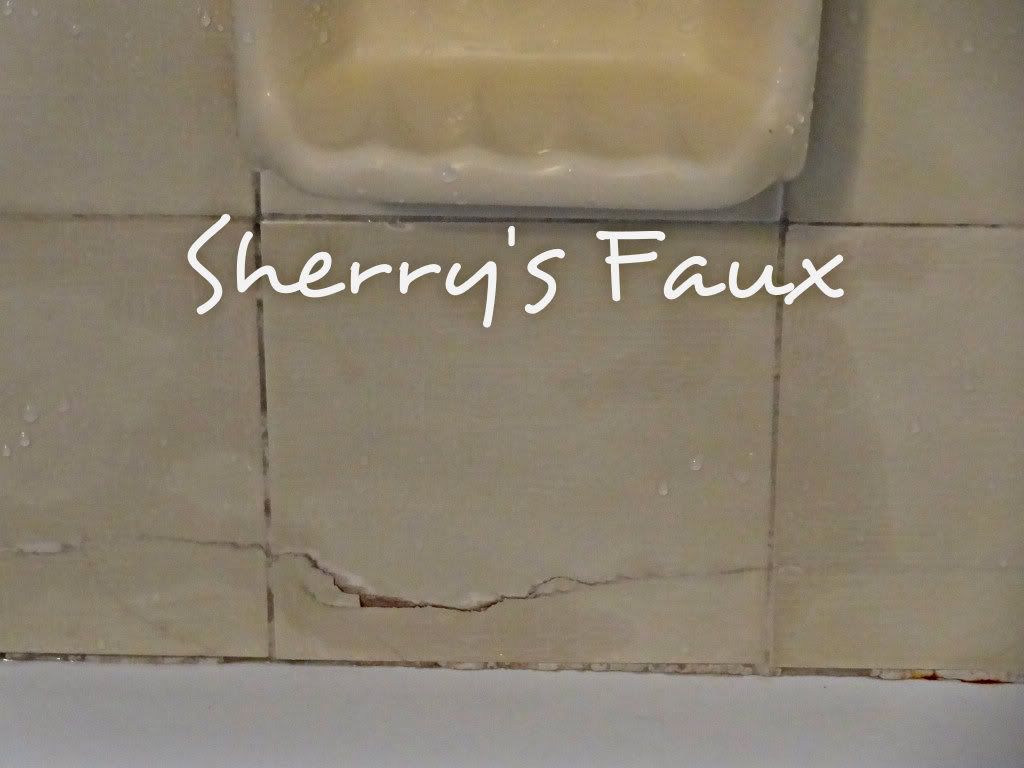 |
| cracked ceramic tile |
CERAMIC TILE AFTER (you can see more here)
 |
| Ceramic tile painted with white homemade chalk paint |
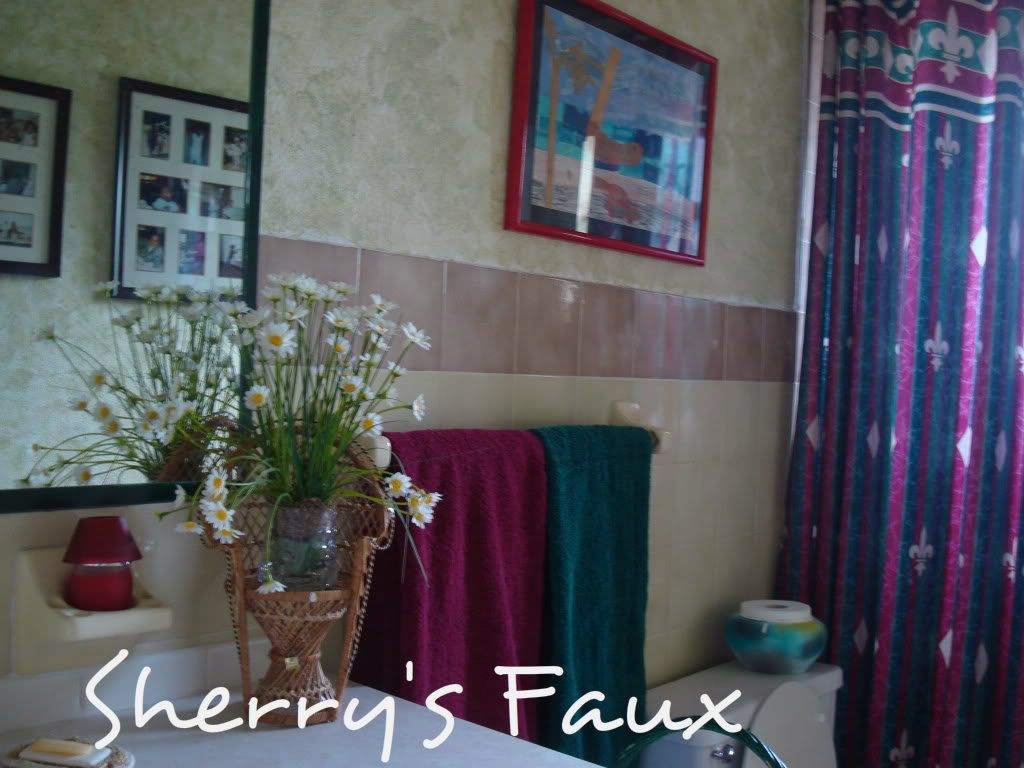
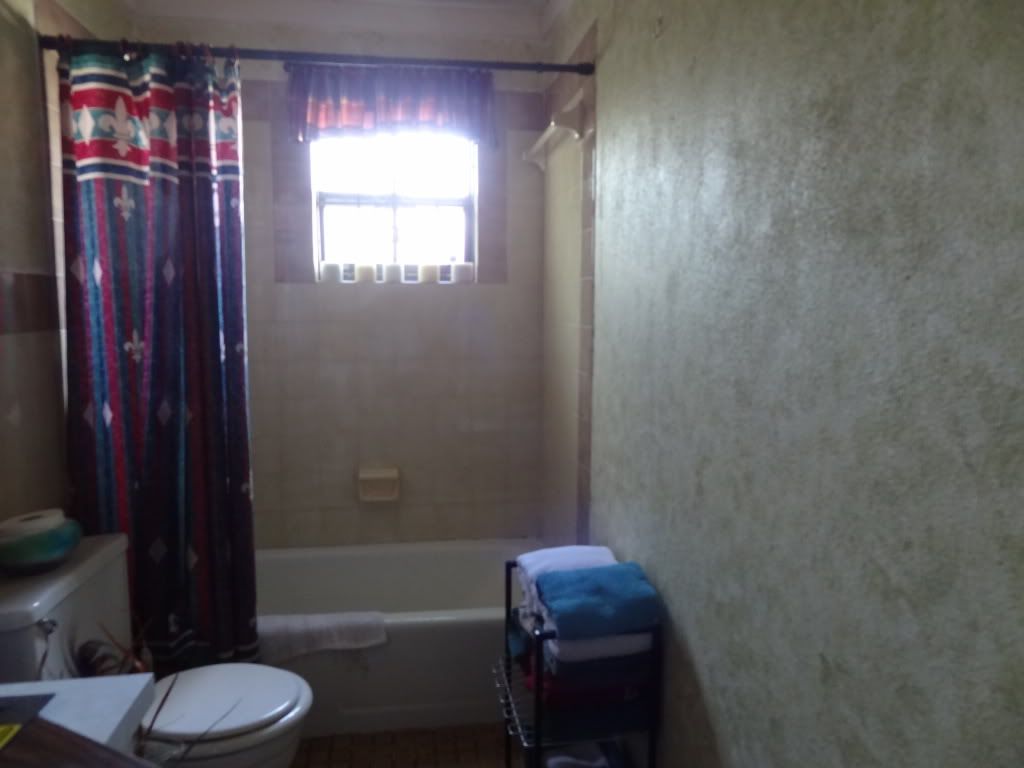
BATHROOM BEFORE
BATHROOM AFTER (I spray painted curtain rod & clips copper & silver; took 2 pieces of sheer fabric light green & off-white cut to size, layered and then clipped on. I had been holding on to the shower curtains for about 6 months)
You can see I still use jewelry to accessorize
 |
| Green vanity with raised stenciling |
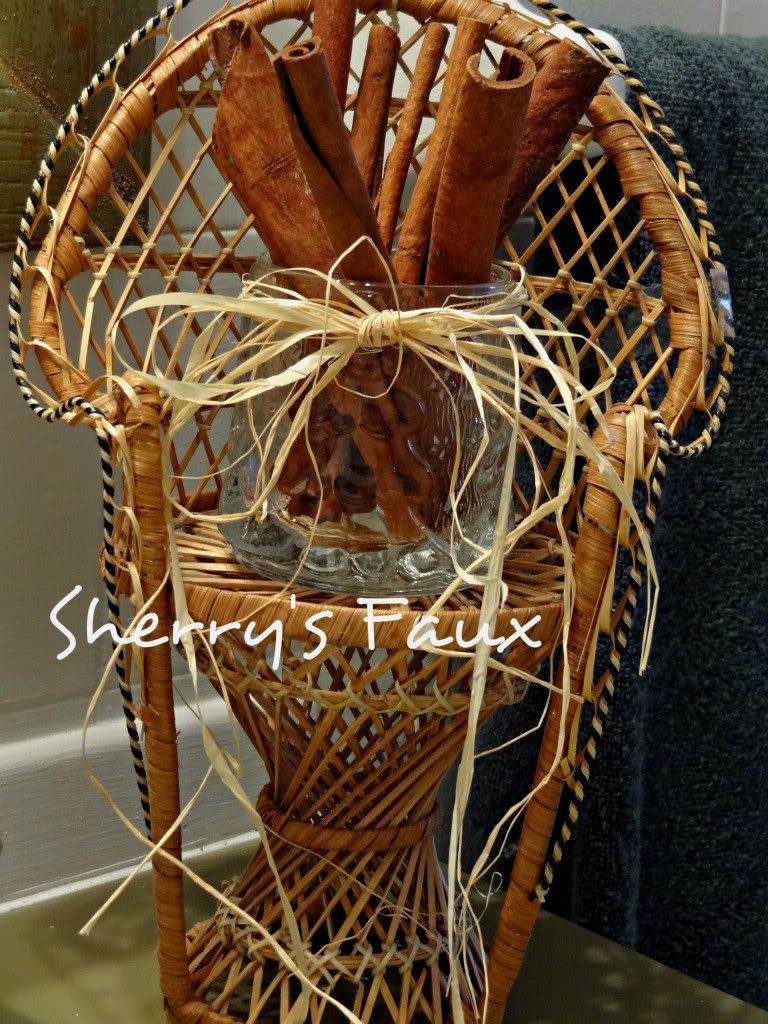 |
| Glass contains cinnamon sticks |
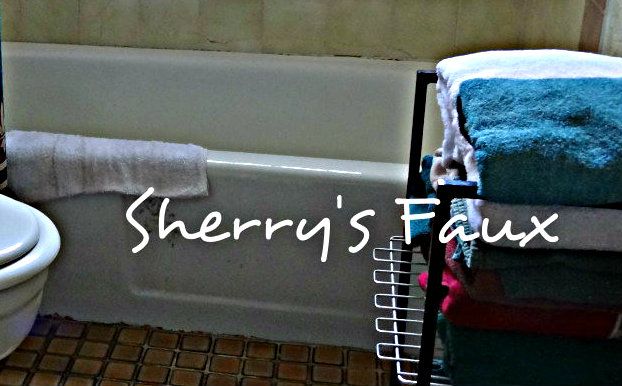
Computer paper rack used for towels; toy bin painted black used for wash cloths & waste paper bin fit neatly under rack.
 |
| computer rack converted to towel rack |
 |
| bath vanity with raised stencils |
There are still the small details, my walls are bare but I'm not rushing. Oh, and there is one thing I've decided I won't touch... the soap on the ceiling!
 |
| soap on ceiling |
When I look up I have too many fond memories of a cute little fat cheek boy cheerfully playing in the tub.
BEFORE
AFTER
So, until the holiday season (or when I get bored studying) LET YOUR CREATIVITY FLOW!


10 comments:
Thank God you're safe!!! Great job and I'm going to try painting the tile. See you when you come back and study hard.
Hi Sherry! I'm so relieved to hear you're ok and that the hurricane passed by and didn't do any lasting damage. Watch out for those strong winds, though.
You bathroom is a real treat and shows what hard work you've done. I love the little soap cloche, very cute! (Because fresh soap is pretty, but used soap is icky. It's really clever for you to hide it and still look pretty)
You go do your studies and we'll still be here when you get back! Happy Halloween (and Thanksgiving if I don't see a post from you before)
Great transformation Sherry - you must be pleased. I love your raised stencil work the best, it's so effective.
Good luck with your studies, and glad that all is well with you after the hurricane !
Great job I loooove those black and copper faucets in the shower! Those look awesome! : ).. Glad that you all made it through the storm as well!
you are definately a fantastic creative mind girl
http://glamorousgirlblog.blogspot.com/
Hi, Sherry
You put a lot of work in your bathroom, it looks great!
Wel, it must have shown up on your blog, I remember seeing some things, like the painted bath taps (brilliant!) and the light globe soap holder(which I love!) I don't remember seeing the trim around the bathtub, though, or the way you framed the mirror. The bath tub looks really wonderful! I love those blocks!
You did a great job! I'm redecorating my bathroom too since it was too old and I want it to be more comfy and pleasant. I've bought ROCA furniture and gray-stone paint, I think it's gonna be great!
Regards and thank's for sharing!
Lisa
Im taking a chance that you might see and answer a question even though this post is a couple years old... How have the sprayed faucets and shower fixtures held up? I love the idea, and what a savings if that could work! Thanks, Lisa
Hi! Everything is still holding out well after 3 yrs! A definite cost benefit!
Post a Comment