I had several queries about raised stenciling when I featured my shoe box on my earlier blog. Raise stenciling is one of the easiest ways to transform something from plain & drabby to creative & elegant! Here's some stuff I stenciled over the years.
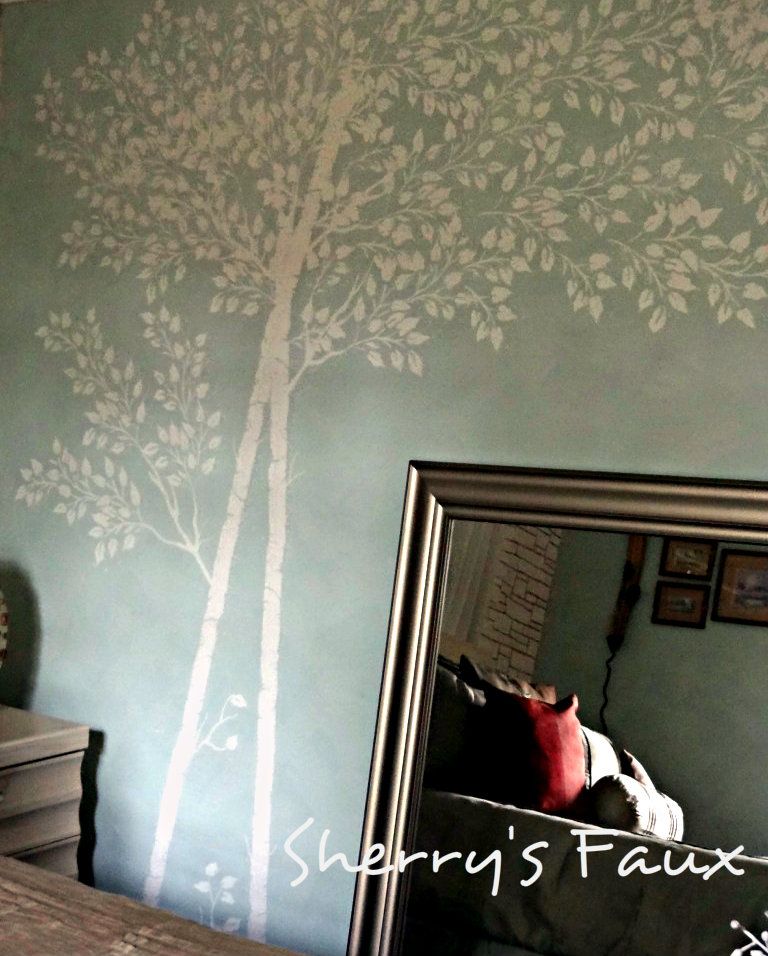
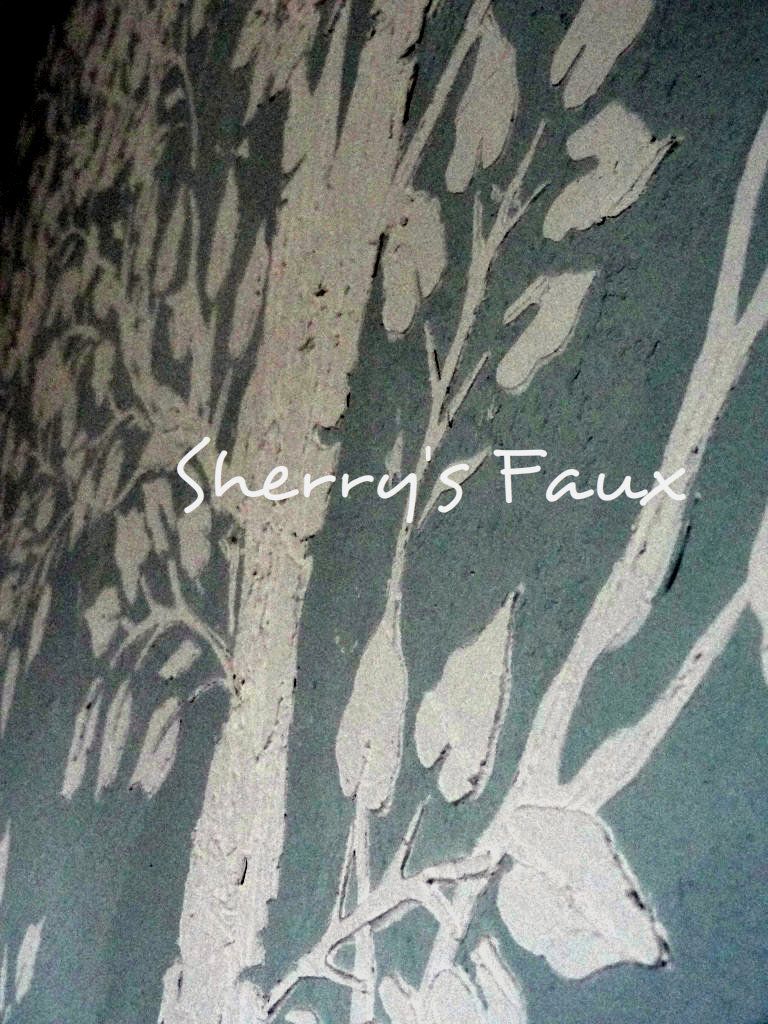
A tree on my bedroom wall
A simple stool


If you want to give this a shot, here's what you'll need to get started
- Ready made Compound (or you can use wood filler)
- Stencil
- Flat end trowel
1st place your stencil where you want your design.

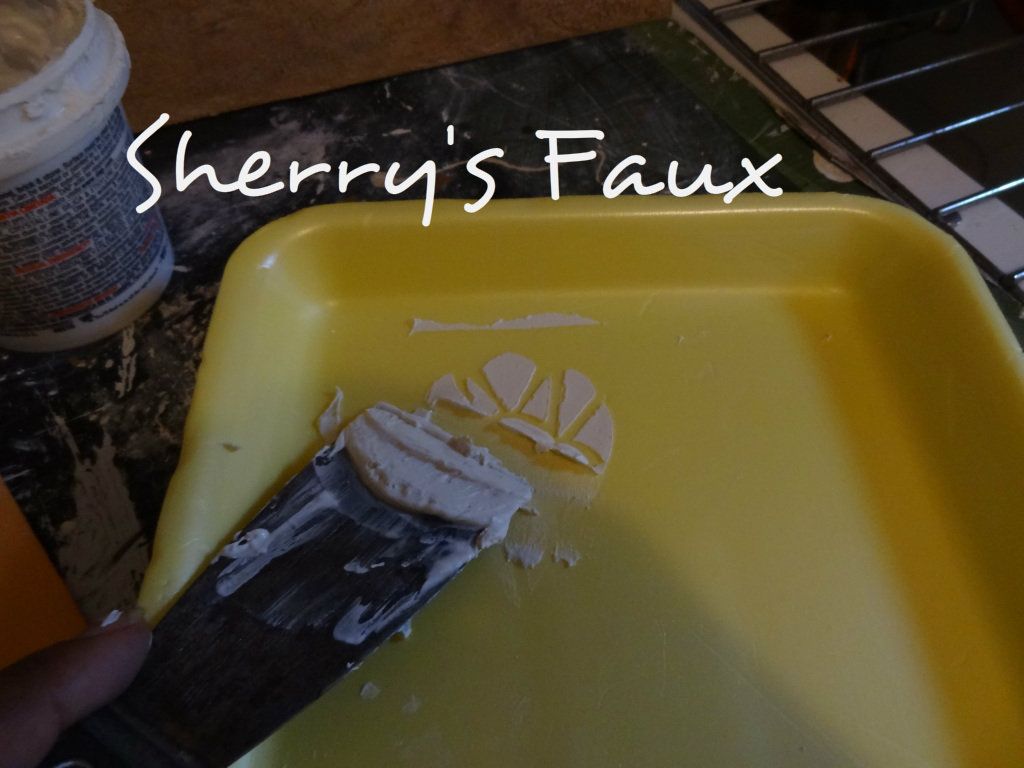
2nd take a little compound and smear it lightly and evenly over the stencil, be sure to hold your stencil firmly to prevent it from moving.
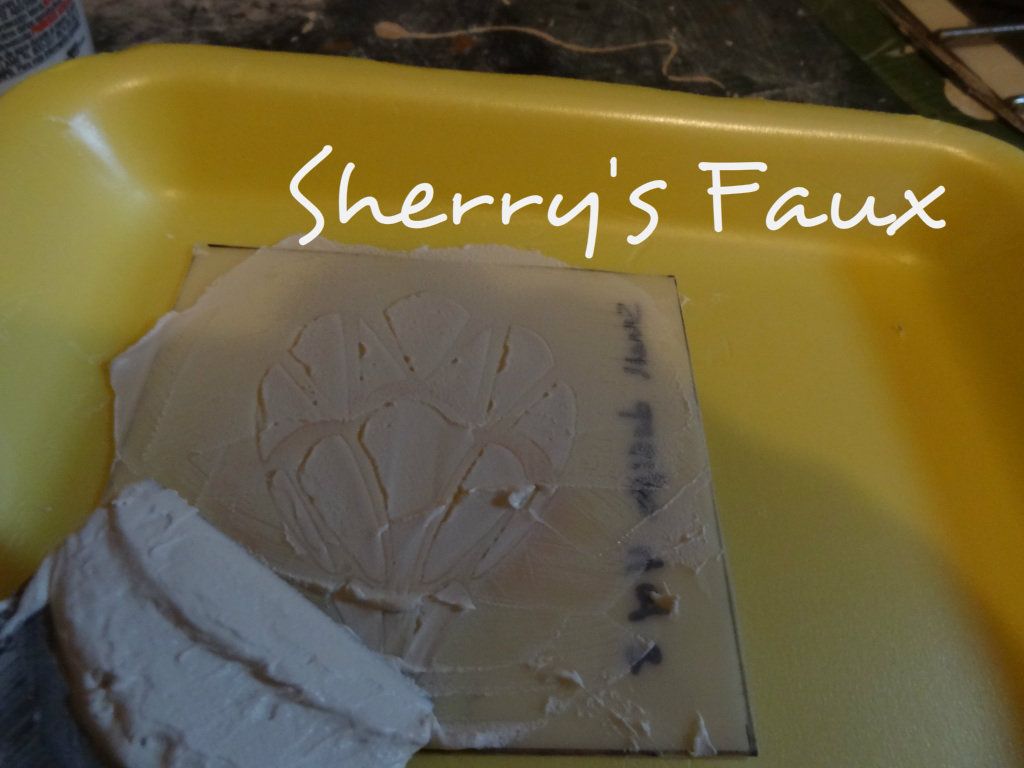
3rd lift your stencil at the edge being careful not to disturb the compound beneath

That's it!
If you have a peak in your design and you don't want it there (I generally like the high's and low's) you can wait until it dry and sand it, or while the design is still wet you can use a toothpick to pat it down (you got to be gentle); you can also use a wet Q-tip to clean up the edges.


The best part about raised stenciling, if you don't like it you can scrape it up and redo it!
If you want to create more depth lay it heavy.


You can add paint to the compound if you want color, but be careful not to add too much or it might become runny and your design won't hold. Also, if you add paint to your compound when it dries the color will be 1 - 2 shades lighter.
Raise stenciling your wall can be lovely - here's my foyer I painted


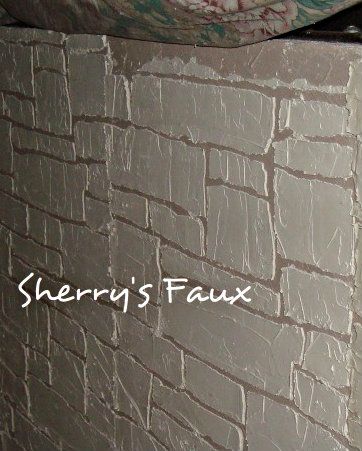
I also did a Stack Stone on my bedroom wall - this was laid heavy to give the appearance of stone.

And here's a Willow tree stenciled on my Living Room wall

Each leaf was hand painted

Once you get started, I'm sure you're going to have fun...

If you decide to give this a shot send me a line and let me know. So, go ahead and LET YOUR CREATIVITY FLOW!
39 comments:
Beautiful Sherry! I love the stenciled walls in your home. They must have taken forever to complete. You are so patient!
Very cool...thanks for the tutorial! xo wendy
Wow! YOU are the raised stencil queen in my book! You do a wonderful job at it. I did some of the stacked stones in a house that I had, too. xo Diana
So cool! I love your techniques!
This is neat Sherry! Thanks for the tutorial.
Thanks so much for the tutorial Sherry. You've done some amazing things with this technique - I especially love the design in your bedroom, lovely colours too.
this is absolutely -- positively STUNNING!!!!! wow!!!! you just continue to amaze me with every project! this is a work of art and we are applauding you!!!! FABULOUS!!!! have to tell you -- peanutbutter and ice cream are a beautiful thing! try it -- i GUARANTEE you will love it! hugs...
I need to find my dimensional goop ;) and try this! I have some, just never attempted it.
I love your wall designs and all the pretty textures with the paint! Gorgeous!
Wow. You have some talent. I beyond love the tree in your bedroom. I can't believe the detail you put into your projects. Lovely tutorial.
Awesome! You make it look so easy and wow - those are all beautiful projects! Thanks so much for sharing the how-to!
Oh goodness me, such talented lady you are!! The tree is TDF!! Wish I can do that like in my dining room, but I don't have your talent...unless..lol. I'm loving all you did, just great! Have a happy week.
FABBY
Hi, Sherry
Great idea and love what you have done.
Vanessa
WOOOOWWW!!! Yes, I saw the show box and was so impressed!!!
Can I be impresseDER??? HAHAHAHAHAHAHAHA!!! You are incredible!!! I wish I could see that willow tree up close! Beautiful!!!
Wow Sherry, what an impact that makes. It looks like you really put a lot of time into this project, but the results are wonderful.
Simply gorgeous, Sherry! Thank you so much for sharing the "how to". All your projects look amazing! :-)
My friend gave me the stuff to do raised stenciling, I just need to do it. You gave me some great ideas! Thank you!
Oh, my Lord! You're the amazing one! This technique is so beautiful! You certainly made that little stool look gorgeous!
Thanks for popping in to see me.
be a sweetie,
Shelia ;)
Your stenciling is fantastic! Thanks for sharing the raised method, I love the the effect. Thanks for visiting my blog, I'm now following you!
I hadn't seen this technique before. So neat. I especially love the foyer wall. Thanks for the tutorial.
Wow, your raised stenciling is great, I love the foyer walls! And the faux brick look as well. Great ideas! : )..
This looks beautiful! I would love for you to share this at my link party
http://thewinthropchronicles.blogspot.com/2012/05/share-it-link-party-9.html
Wow! you have done serious stenciling all around your home! I want to try it, perhaps with wood filler, that's what I have at hand! Thanks for the tutorial!
What a great way to add dimension to the stencil. Awesome!!
Karah
Freakin' AMAZING!!!
What a great tutorial! Does your stencil have to be thick, or can you just use a regular stencil?
Thanks so much for the inspiration!
blessings,
karianne
oh my gosh! i think you could make a lot of money doing that!!!
Hi Kariaane, you use regular or thick stencils, I use both, however my preference is the thicker ones. Thanks for dropping by.
You are putting a whole new spin on stenciling for me...the girl who loves stenciling would lOVE to try this. Thanks for sharing.
Sherry, loving the stenciled tree at the top. Thanks so much for linking it to Frugal Treasures Tuesday! I did a raised stencil oak tree in my craft room of my old place. I combined it with flat stencils, faux painting, hand painting, and then added miniature birdhouses. I recently did a raised stencil on my headboard of a rose bouquet! I just love checking to see what your mind will create next. : )
OMG Sherry! You always amaze me. I am dying over your stone wall. You are crazy woman! That looks absolutely amazing. I can't believe that's not real stone. You are brilliant.
I'm currently doing a simple paint stencil on my living room wall and am dying already. It's so time consuming. This makes you just that much more impressive in my eyes. :D
Hi Sherry,
I have never seen this technique but it is so amazing. Love the texture and those leaves on your willow tree are awesome!
You do beautiful work! I did a ivy wall. Mine did not come out as pretty as yours.
Dee
Ok, girlfriend, I'm hooked! I must try this. Thanks for sharing the step by step tutorial.
Your stencils in your home are wonderful! You have to have a ton of patience.
Pat
I am totally impressed, what beautiful work. Amazing technique. Thanks for sharing your creative inspiration over at Sunday's Best!
Wow! Those tree stencils are amazing, Sherry! I especially love the one on your bedroom wall. It makes it seem so serene in there.
Sherry,
Seriously - these are amazing! The details ... you are a rockstar! I'm still working up the strength to do a simple stencil!!
Kelly
Wow..Impressive! Iv taken a look around your blog and it is really what I wanted to see..amazing stuff coming out of the ordinary. Would love to see more of your ideas.
Sherry, I'm so glad you visited my blog and invited me over to yours. You are extremely talented and I love all the creative items you've shared. I would love to invite you to share them on my Creative Thursday Link party at www.michellestastycreations.blogspot.com. I'm now following you too :) Have a great week.
Sherry, Thanks so much for linking up your beautiful work to my Creative Thursday link party. I hope you'll be back again and again. Your work is truly wonderful :) Have a great week.
Post a Comment