Showing posts with label plastic stool. Show all posts

Monday, April 30, 2012

Raised Stenciling

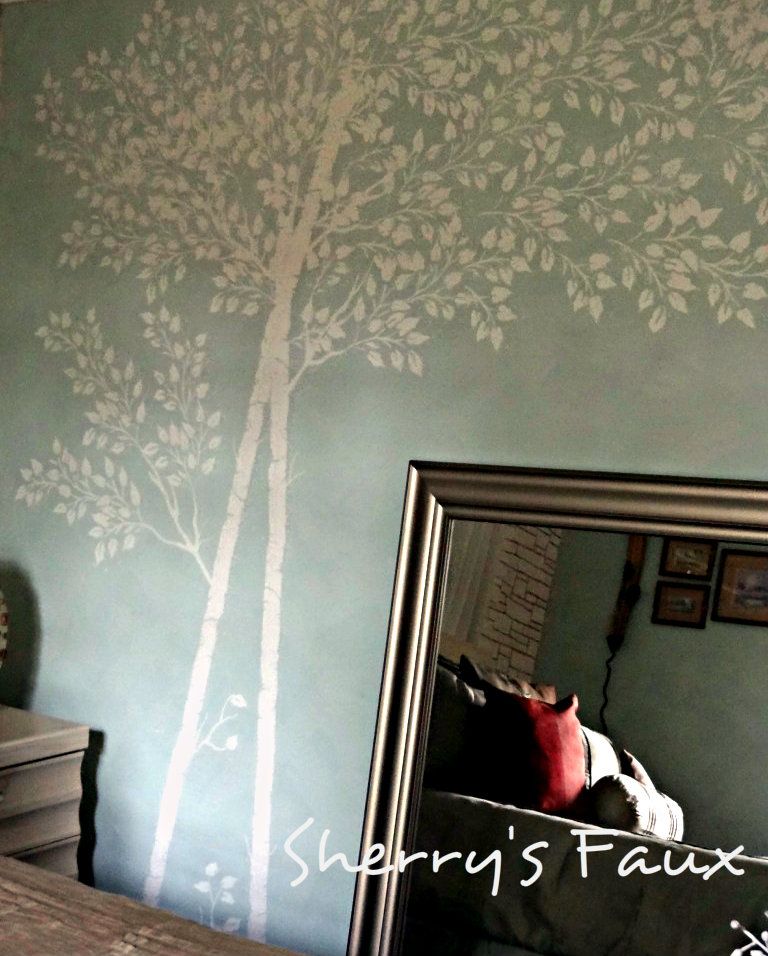
I had several queries about raised stenciling when I featured my shoe box on my earlier blog. Raise stenciling is one of the easiest ways to transform something from plain & drabby to creative & elegant!  Here's some stuff I stenciled over the years.

A tree on my bedroom wall


A simple stool


If you want to give this a shot, here's what you'll need to get started

  • Ready made Compound (or you can use wood filler)
  • Stencil
  • Flat end trowel

1st place your stencil where you want your design.


2nd take a little compound and smear it lightly and evenly over the stencil, be sure to hold your stencil firmly to prevent it from moving.
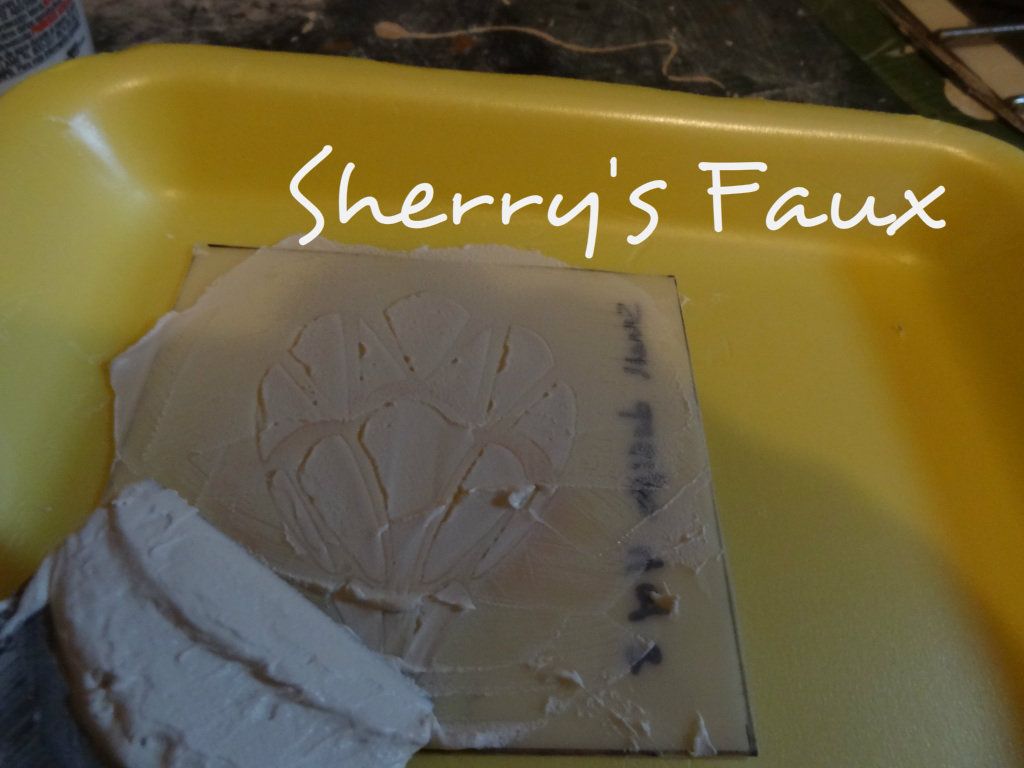


3rd lift your stencil at the edge being careful not to disturb the compound beneath


That's it!


If you have a peak in your design and you don't want it there (I generally like the high's and low's)  you can wait until it dry and sand it, or while the design is still wet you can use a toothpick to pat it down (you got to be gentle); you can also use a wet Q-tip to clean up the edges.


The best part about raised stenciling, if you don't like it you can scrape it up and redo it!
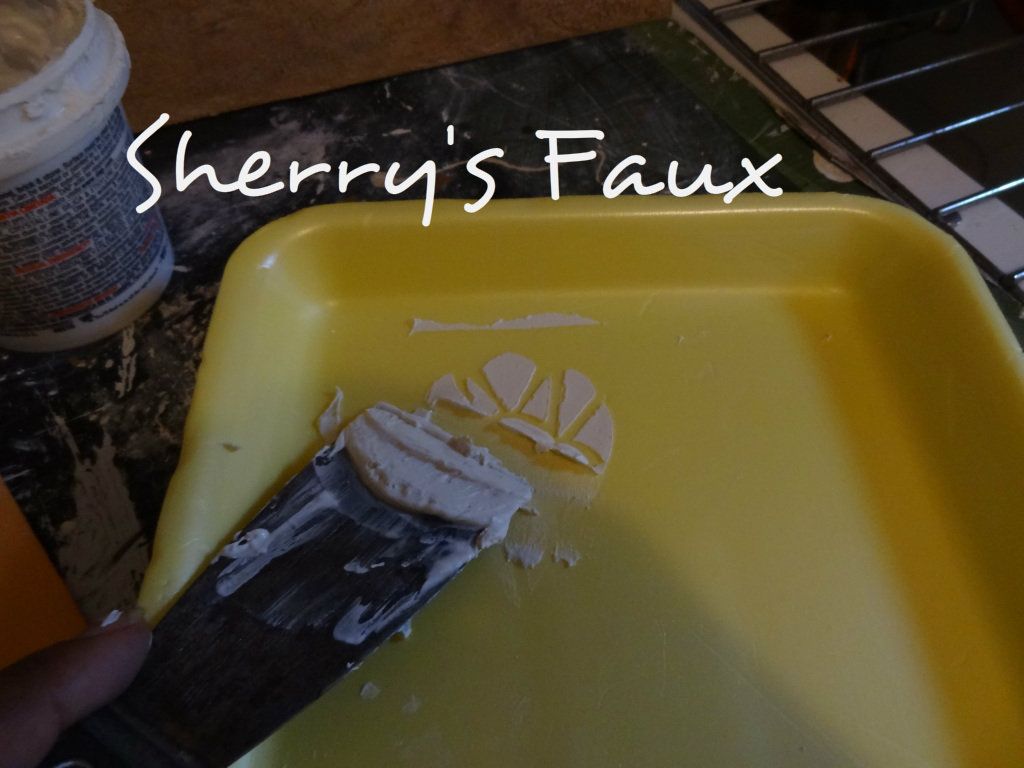


If you want to create more depth lay it heavy.


You can add paint to the compound if you want color, but be careful not to add too much or it might become runny and your design won't hold.  Also, if you add paint to your compound when it dries the color will be 1 - 2 shades lighter.


Raise stenciling your wall can be lovely - here's my foyer I painted


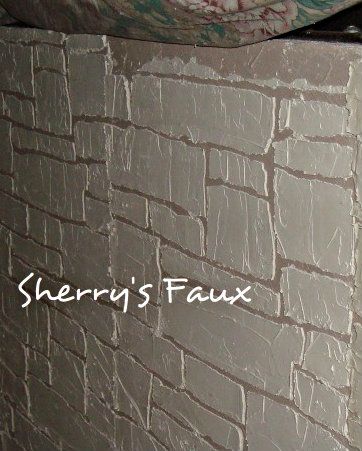
I also did a Stack Stone on my bedroom wall - this was laid heavy to give the appearance of stone.


And here's a Willow tree stenciled on my Living Room wall


Each leaf was hand painted


Once you get started, I'm sure you're going to have fun...


 If you decide to give this a shot send me a line and let me know.  So, go ahead and LET YOUR CREATIVITY FLOW!


Thursday, August 11, 2011

That plain plastic stool

Do you remember that plastic stool you bought for your kids or yourself?  You know the one that you kept at a counter, breakfast nook or maybe outside on the porch or patio.  To be honest, I bought this plastic stool because I couldn't afford anything else at the time.  My son, his friends and me got plenty of use out of this stool. 


It was now ready for the dump, but in these tough economic times I can't afford to throw anything in the dump.  Plus, I needed a stool in my bedroom so I decided to perform plastic surgery....ha, ha, (plastic surgery for the plastic stool).  Okay jokes aside.  

First I primed it, then I did a color wash using off-white, cranberry & bronze, not much just enough to give it some color.  Afterward to give it more detail I decided to add raised stencils.  Once the compound from raised stencils was dry (usually a day) I stained it with a natural walnut.  The next day I used polyurethane to seal it.  Doesn't it look cute & polished....

I think you can see the cranberry peeking out in this pic.


But once it was against my Armour I thought, nah, you're not pretty enough, more surgery was needed, so I looked for an assistant... I scrambled in my closet in search of something, but not sure what, and I came across an old English linen tablecloth I had held on to for years.
I just love the embroidery, especially the centerpiece.
So I decided to cut it out!
And I added a small piece of foam cushion to make it nice and bouncy then sewed a cute little button in the middle.  To make sure it didn't move when I rested my weary bottom on it, I used ribbons and tied them to each leg of the stool.
 
 
 And then I put it back by my Armour, where it belonged.

 
Now, should I tell you the story about that table on the other side? Or, maybe you prefer to hear about what happened to the rest of the tablecloth?  But until then, if you haven't already,  you can check out my bedroom.  Now go and, LET YOUR CREATIVITY FLOW!