Sometime ago I read on Karen's blog about her No Sew Ottoman Slip Cover. Although I don't own an ottoman, I do have a chest that my son had made when he was in preschool (yeah, like he really made it), actually I think the teacher or one of the assistants built it, but they probably let him bang on a nail or something... this is the chest

Yeah, I know, horrifying. It didn't always look like this, but years ago when I had my sofa upholstered they told me that they could upholster the chest free of charge with the remaining remnants. So, this is what you get when it's free. I was ready to dump it, but it was made by my son over 15 yrs ago, and I'm a sentimental fool, plus it did have good storage space, something I can always use.
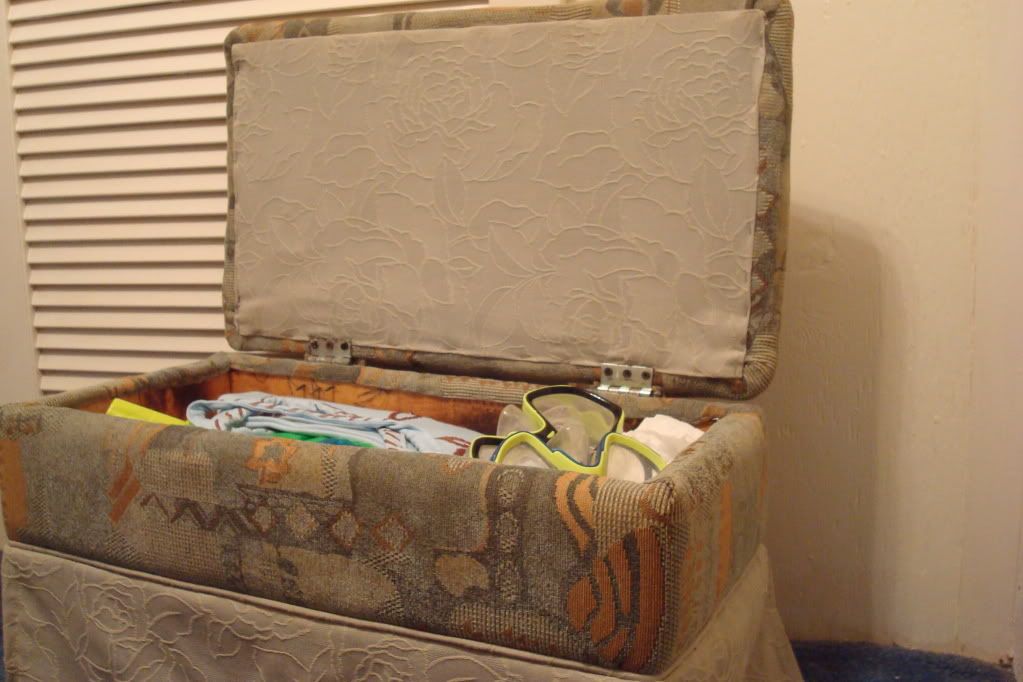
It was a eye sore so I kept it knocked about in the Guest Bedroom.
While browsing the blogs I came across Karen's blog about the no sew ottoman cover and a light bulb lit up. I was ready to give this a shot but first I couldn't make it to the fabric store then I decided I didn't want to spend any money. So I searched in my storage containers and I came across some kitchen curtains that I no longer had use for. They look white in the photo but they're actually ivory. Please forgive my make-shift window (smile)
While browsing the blogs I came across Karen's blog about the no sew ottoman cover and a light bulb lit up. I was ready to give this a shot but first I couldn't make it to the fabric store then I decided I didn't want to spend any money. So I searched in my storage containers and I came across some kitchen curtains that I no longer had use for. They look white in the photo but they're actually ivory. Please forgive my make-shift window (smile)
 |
The curtain is 5 pieces in total (1 valance, 2 side panels & 2 bottoms).
So, now I was ready to start...
I took the bottom curtain (which was the longest) and adjusted it on one side of the chest (the scalloped edges hung on the side of the chest)
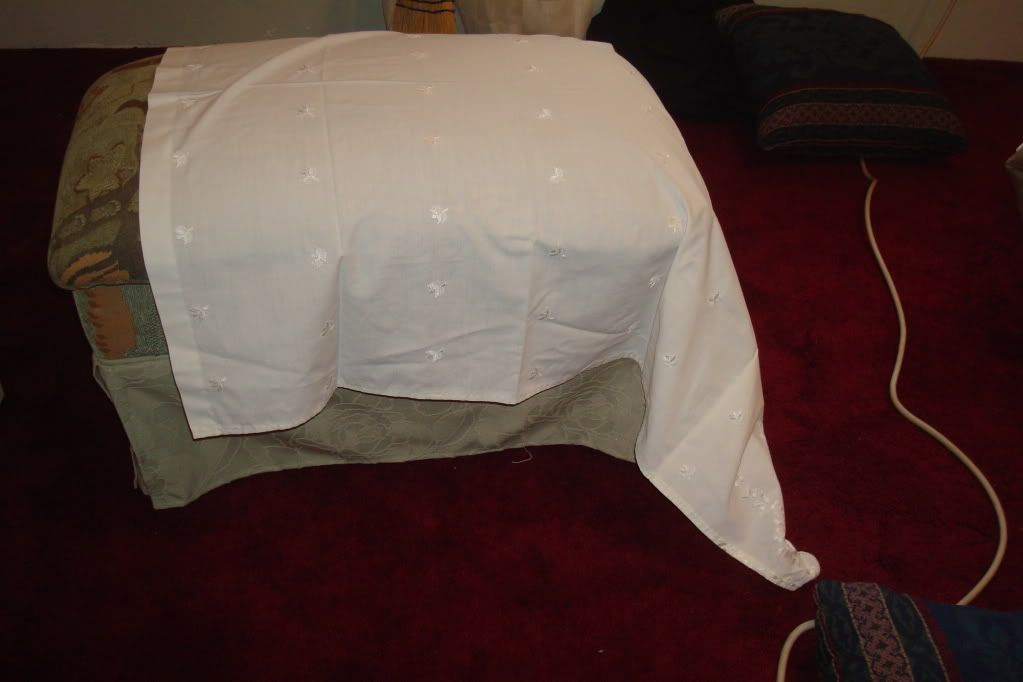
Then I did the same for the other side, I was careful to adjust them to make sure they were even on both sides.

Satisfied, I started gluing the curtains while they were still on the chest. Actually I only glued it partially, then I removed the curtains laid them flat on the floor and finished gluing.


While that was drying (about 5 min) I took one of the side curtain panels and adjusted it on the back of the chest.

I then took the panels that I had already glued and placed them back on top of the chest, on top of the panel that I had just placed on the back. I adjusted the curtains to make sure they were even, used straight pins to make sure they didn't slide and then proceeded to glue them while still on the chest.

 |
| Back |
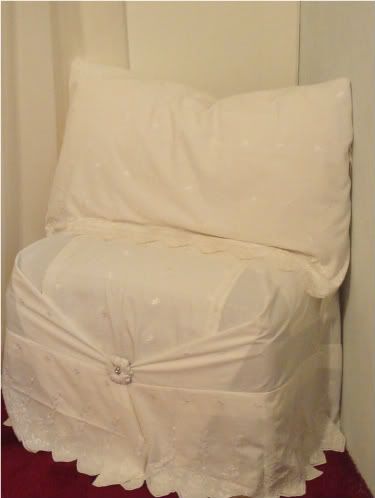
This is what the Front looks like - I just realized I didn't take any pictures of the back, but in the above picture you can figure out what the back looks like.
 |
| Front |
I then pulled the two sides together and pinned them in place


Well that's pretty much it. If you want you can add a ribbon or nice button or something in the front. I remembered I had two shoe clips that I no longer used - the buggers hurt my toes like crazy. I did try using clip on earrings, but the grip isn't strong enough.
 |
| Shoe Clips |
I liked the gold shoe clip, but it was a bit gawky....

I remembered I had chalk paint so I painted it - I only used one coat because I kinda wanted some of the gold to peek through.

Well, that would have been it, but I still have 2 pieces left so I decided to make a partial pillow cover (didn't have enough material for the back, so it could only be partial (smile)).
Using the other side panel, I folded it over about 6" from the top and glued the sides. Now this is where I lied, you do have to sew, but it's really called tacking. I found some elastic and tacked the ends down on both sides of the panel (this is to keep the pillow in place when you slide it in).

 |
| Pillow slid into back of pillow case |
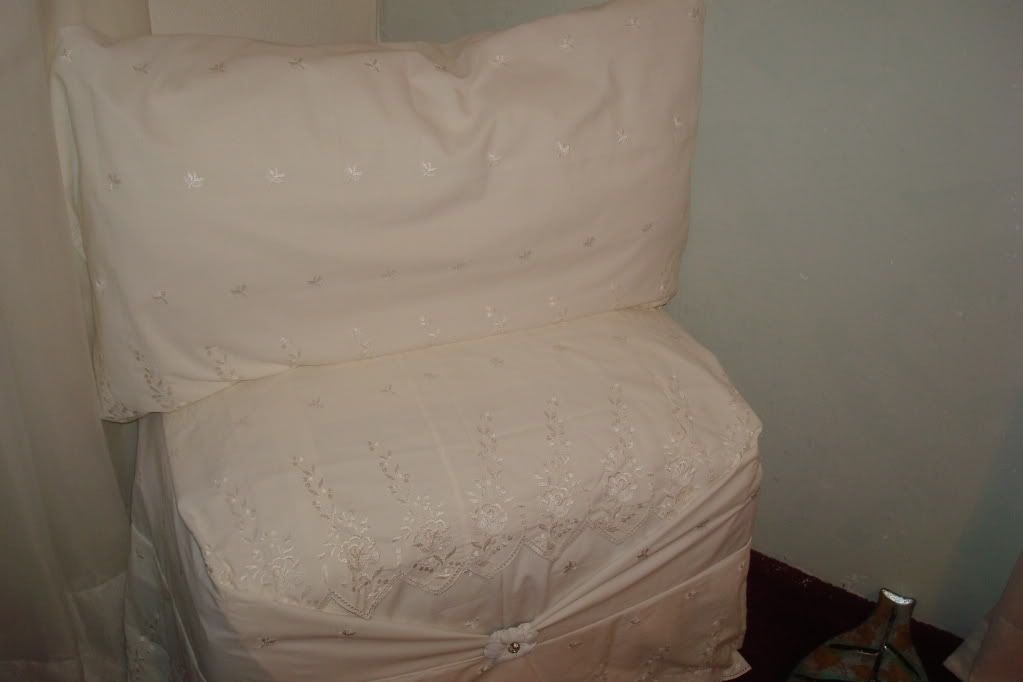
This is the chest with the pillow
I could have left it like this, but I didn't like that you could see the overlap (you don't have to worry about this if using darker or heavier fabric). So I decided to add the valance on top.


There you have my No-Sew Cover for a toy chest. If I hadn't told you, would you have known it was a toy chest????
BEFORE

AFTER

This is what happens when you LET YOUR CREATIVITY FLOW!
15 comments:
I seriously hope you link this up to a few parties. It's an awesome makeover. I love the romantic look.
I really like your idea to add the clip. You could also use an old brooch-I see them all the time at our local antique mall.
You are right much better!Like the spot you put it in as well.
It's beautiful! Love the pretty white look....
Wow what a great idea! It looks really great- I love the way the clip and knob dress it up- elegant and romantic!
So Clever!! We are following you back!
Brooke from babblingsandmore.blogspot.com
WOW! This turned out great!! I love the little embellishment, so pretty.
Have a great weekend.
Smiles
Very pretty! I think we all need to save this for when kiddos are grown and toy chests are left behind! I'd love for you to link up at Tuesday's Nursery! It's for any & all in kids decor. I hope you can make! Nan
www.playfuldecor.blogspot.com
Wow! What you do without sewing is amazing!
Really pretty! !
Well done! You should definitely link this up to a DIY or decorating link party.
I love this post. I would have never thought of painting the flower piece to tone it down. It is now very classy. Great job.
Cindy @ changeofpacecreations.blogspot.com
Thats a super impressive makeover!! :-)
Wow! This is so elegant and clever! Thank you for sharing this post on Thrifty Peach Blog Hop! I hope you come back again to share another great post. :)
I hope you are having a wonderful weekend!
What a transformation!!! Amazing and so beautiful!!! :) Thanks for stopping by. You have a new follower too. :)
Post a Comment