Around 2009 I redid my kitchen and I loved the transformation it was like major reconstructive surgery. Check out the photos below.
BEFORE
How outdated is this??? Wow, can you believe the yellow formica... :-)
AFTER some sweat and elbow grease I came up with this.
Major difference from yellow formica and brown door - did you see the garbage bin??? :-) Why shouldn't I paint it? I wanted something sophisticated looking to hold all that stinky garbage. ha, ha
Anyways I was happy with the transformation, ok, ok, I know the borders got to come down but overall I was content. But then I received an email about a product called Giani Granite. It was free so I thought why not give it a shot it can only cost me my time.... So I ordered the product and when it arrived I took the plunge. First let me say Giani includes everything in their kit - roller, sponge, paint, primer, sealer & foam brush. You just need trays to pour your paint in.
I found this picture on site and decided this is the look I was going for; I especially like the crown molding; wish I could have that stove.
So, let's begin all over again. Because my counter top was previously sealed with polyurethane, I decided to sand and then prime with a shellac based primer (this wasn't included in their kit).
I then primed with the black primer that was included in their kit.
Once the primer dried - I gave it a day - I was ready to play around with the colors. You get 3 different colors, I ordered DARK CHOCOLATE so I received Inca Gold, Chocolate Brown & Brown Felspar. I didn't like my first attempt I thought it was too dark for my kitchen. But the best part about paint is that you can repaint!
Thankfully I didn't have to repaint it I decided to add more of the Inca Gold and tried covering most of the black primer beneath. I loved the way it turned out (almost like my dream kitchen).
This is it close up
Giani Granite comes with easy step by step instructions, it's almost fail proof. I would highly recommend it. It took me approximately 2 days to complete my counter that's because you have to wait almost 8 hours after priming to apply paint. They also send you a dvd with instructions. You can check them out here.
With that finished I started on the crown molding and this is my friend that helped me. I picked him up at Kelly's.
Most women pick up men, I pick up a mitre box! I get goose bumps walking around the hardware store! If you never used a mitre box it's really easy, this was my first attempt and I'm already thinking of other possibilities. You can check out this site if you need to learn how to cut crown molding mitre box.
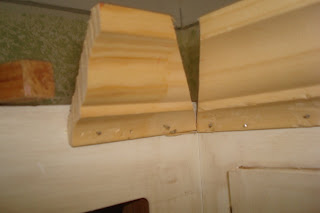
Everything was working out fine until this.
I couldn't get the angles to meet. I cut several pieces of molding but I couldn't get the angle correct. After about an hour, I had concluded I would have to hang a hanging plant over that part of the cabinet to hide the opening....
But after some persistence I got it right, it took me almost 45 min to cut this tiny piece of molding and it fit!
Once that was completed I had to caulk.
The final pictures
closeup of counter
Sorry for all of the pictures but I'm so proud of my work. In total it probably cost a little over $270 with the biggest expense being my faucet.
Here's the Breakdown -
- Faucet $145
- Mitre box $39
- Hooks for curtains & sheers $36
- Molding $51
Everything else was recycled and discussed under another topic:
- Rods for curtain & sheers - shower rods from bathroom
- Curtains - old table cloth
- Sheers - part of shower curtain
- Vase for floral arrangement - lighting fixture taken down from bathroom & foyer
- Silk Flowers - previously on top of kitchen cabinets
The most satisfying accomplishment in life is knowing you gave it your best.
LET YOUR CREATIVITY FLOW!


7 comments:
Glad your hard work gave you everything you wanted.
Beautiful transformation! It is amazing what a little paint can do. :) Thanks for sharing at Roomspiration today!
Wow! What a fun history/transformation! That product is awesome and what an improvement! Love it! Thanks so much for sharing in the Roomspiration kitchen series! :)
That was a lot of work! I relate to your "about me" description. My husband was layer off twice in two years. He finally has a job but is making less than half of what he was. I started painting furniture to make money and painting my house was the cheapest way to feel like I had something new.
WOW! Your kitchen looks great..awesome job :)
wow, what a transformation! I am wanting to redo our counters that are boring beige, I just don't have the guts yet! New follower!
All I could say is "WOW" your kitchen is adorable!! You're much more brave than me, I haven't had the nerve to do over my counters yet!! Thank you for your wonderful comment on my kitchen and stopping by to say hi!
xoxo
Jeri
Post a Comment